Niagara N4 gives you "Program is not signed"? Let's get rid of it
2 June 2026 · 5 min
#niagara,#n4,#tridium,#code-signing,#gtb
Hello BMS folks! 👋
Okay, set the scene: you’re on site, Workbench open, you’ve just whipped up a nice little Program object — three lines of logic in onExecute(), nothing fancy. You compile, proud of yourself… and there it is, the little orange dot of doom with the message that will follow you all day:
Program is not signed.
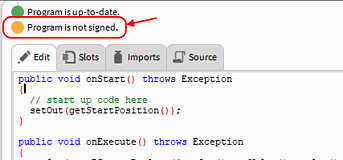
Your first reflex? Recompile. Obviously it changes nothing. Second reflex? Tell yourself you broke something. Spoiler: no, you broke nothing. Tridium has simply decided that from now on, your code needs to be signed.
So let me explain where this comes from and above all how to get rid of it cleanly. Count about ten minutes, stopwatch in hand.
What’s this signing business?
Niagara N4 will eventually require code signing for all Program objects. In plain terms: Tridium wants to make sure the code running in the station was produced by someone identified, and not thrown in by the first joker passing by.
It’s security, and honestly it’s rather healthy. The problem is that the day it kicks in, if you don’t know about it, it feels like your station is broken. The products you’ll most often run into:
- I/A Series N4 — Jace 8000
- I/A Series N4 — Enterprise Server
The solution fits in one sentence: we’ll create a certificate in Workbench, and use it to sign our Programs. Once, done properly, and never speak of it again. Let’s go.
Step 1 — Create the certificate
In the Workbench menu: Tools → Certificate Management.
⚠️ Watch out, classic trap: you do NOT want the Platform’s Certificate Management. That one is different, it’s for running stations. You take the one under Tools. Write it down somewhere, it’s the mistake everyone makes at first.
Then:
- User Key Store tab → click New.
- Fill in all the required fields (Alias, Common Name, etc. — put explicit things, your future self will thank you).
- THE detail not to skip: the Not After date. By default it’s +1 year. If you leave it, your certificate expires in a year and you redo the whole story. Push it far out. Like 2099. We’re not ten years short.
- In Certificate Usage, make sure to select Code Signing.
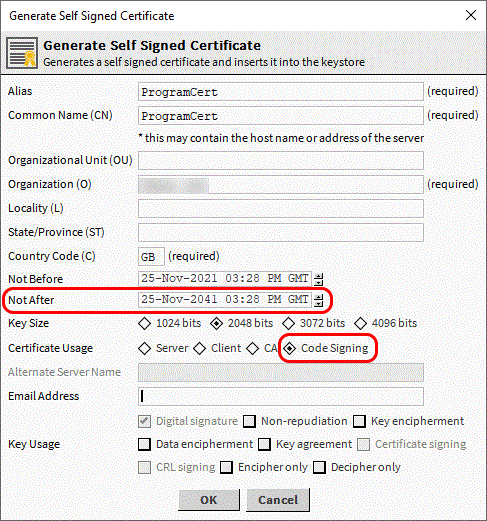
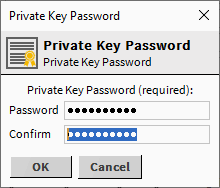
Validate with OK, and it asks you to set a password for the certificate.
📝 Workbench will ask for this password again at compile time. So don’t pick it at random on a Friday night, and put it in your password manager. Not on a sticky note. I said not on a sticky note.
Step 2 — Export the certificate
Now we’ll take the certificate out of the Key Store so it can be recognized elsewhere.
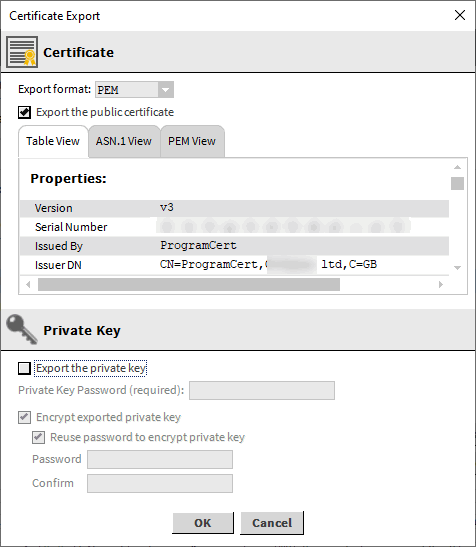
Select your brand-new certificate, then click Export.
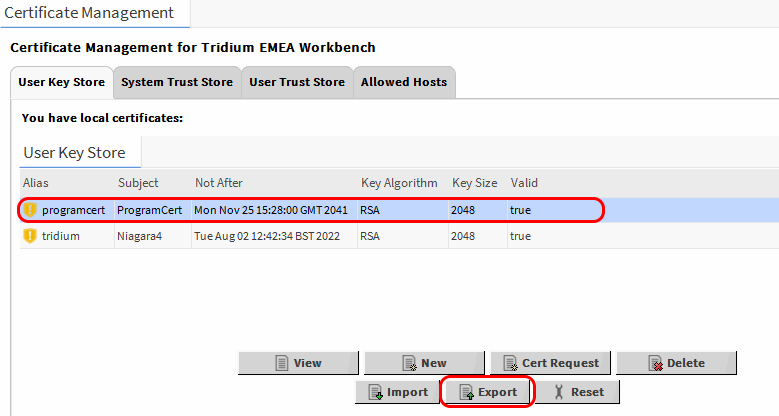
Important point: you export the certificate WITHOUT the private key. It asks for a file name and location. This “public” version is the one we’ll get approved everywhere.
💡 The pro tip: also make an export WITH the private key, keep it safe with an explicit name (and its password). Why? The day you change PC or work from another machine, you can reimport exactly the same certificate instead of making a new one. That saves you from having fifteen different certificates floating around.
Step 3 — Tell Workbench we trust it
We just created the certificate, now Workbench needs to accept it.
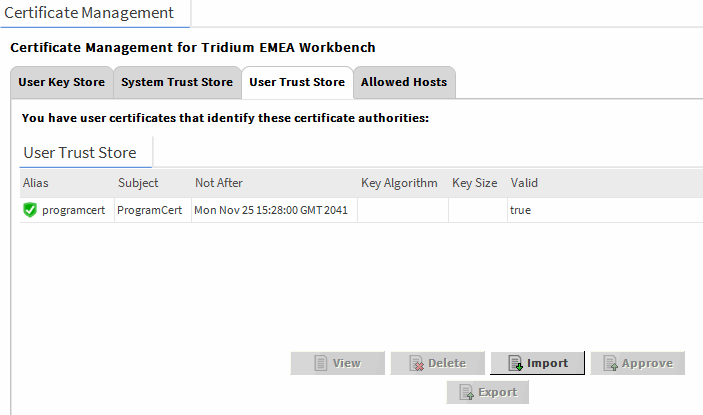
- Switch tabs, head to User Trust Store.
- Import button at the bottom, select the certificate without the private key (the one from step 2).
If it turns green, you won: it’s accepted. 🟢
Step 4 — Plug the certificate into code signing
Almost done. We just need to tell Workbench: “to sign, use THIS certificate”.
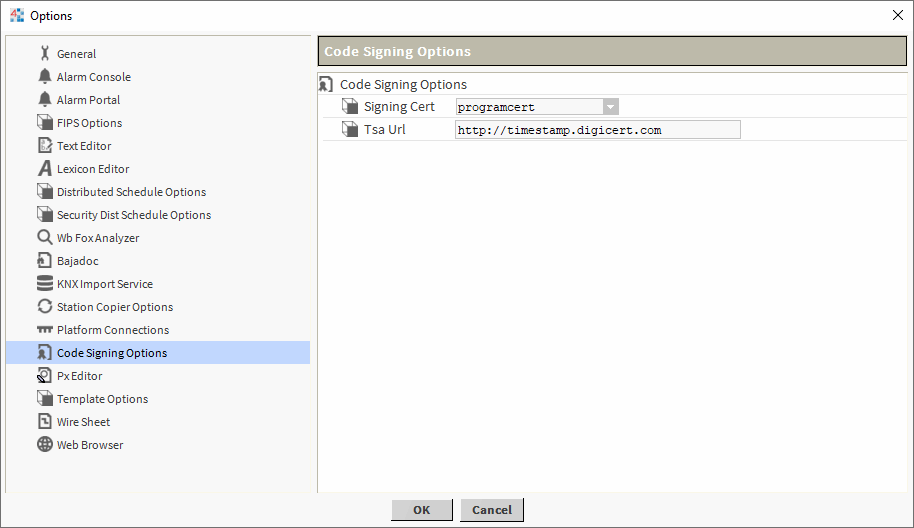
- Menu → Tools → Options.
- In the left pane, find Code Signing Options.
- Signing Cert section → select your certificate (the one you just turned green), then OK.
There, Workbench now knows what to sign with. But we’re not quite done…
Step 5 — Configure the local Platform
Last piece for the local station: your machine’s Platform must also trust the certificate.
- Open the Platform localhost → double-click Certificate Management.
- User Trust Store tab → Import → and reselect the certificate without the private key. (Yes, that one again. It’s the same everywhere, that’s the point.)
And… it compiles! 🎉
Back to your Program object. You compile.
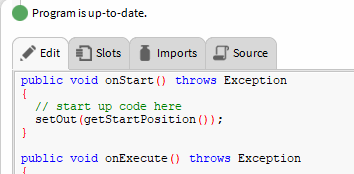
📝 The first time, Workbench asks for the certificate password (the one from step 1, you did store it, right?). You enter it, and…
…the dot turns green, the code compiles, no more grumbling message. Program is up-to-date. Bliss.
“Yes but mine is on a remote Jace”
Ah, the classic. You do all the above, everything works perfectly locally, you proudly push to your Jace 8000… and it throws a brand-new message at you:
Certificate not trusted.
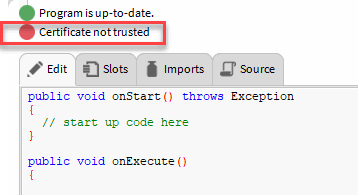
Makes sense, really: your Jace has never heard of your certificate. You need to introduce it, exactly as you did for the local Platform.
- On the Jace’s Platform → double-click Certificate Management.
- User Trust Store tab.
- Import → your certificate without the private key.
And that’s it. Your Program objects now compile peacefully on the Jace.
🔁 Remember: the “without private key” certificate is the one we carry everywhere (Workbench Trust Store, local Platform, each Jace’s Platform). Every new machine or new Jace that has to run your signed code, you just redo this import in its User Trust Store. Five seconds.
Summary
To never get caught again:
- Tools → Certificate Management (not the Platform one!), User Key Store tab → New, usage Code Signing, expiration date pushed far out.
- Export without private key (and a backup with private key kept safe).
- Import into the Workbench User Trust Store → green.
- Tools → Options → Code Signing Options → point to your certificate.
- Import the certificate into the User Trust Store of each Platform (local and each Jace).
Ten minutes, once, and the “Program is not signed” error becomes a bad memory. Now go back to coding your logic in peace.
Have fun 🛠️
$ gtb react
Did this article resonate?
$ gtb comments --tail
Comments
// loading…